How To Write A Defect Report
After executing our test scenarios, it is expected to find defects in the system under test. Those defects should be reported in a defect report. The defect report must be written clearly so that the developer can understand where the issue is and be able to reproduce it. In this article, we will discuss how to write a professional defect report.
1) Title:
The title should describe the issue that occurs in the software. The developer should understand the problem just by reading the title only. For example, if there is a defect in the login page. When the user checks the “remember me” checkbox, the checkbox is not checked.
A good title for this defect would be: Login -> Checking “Remember me” checkbox isn’t working
A poor-written title for this defect would be: Problem with login
2) Steps to reproduce:
The steps should be clear so that the developer can follow them to repeat the test and reproduce the defect. The steps should be numbered. If this is a mobile application, the first step should be opening the application. If this is a website, the first step should be navigating to the website URL.
If this is a website, the steps can be:
Go to outomated.com
Click on Login/Sign up
On the login page, check the “Remember me” checkbox
If this is a mobile application, the steps can be:
Open the application
Tap on Login/Sign up
On the login page, check the “Remember me” checkbox”
3) Expected result:
The expected result describes the expected behavior of the application. In other words, this is how the application should behave after the developer fixes the defect. For our example, the expected result can be: Checking the checkbox should work normally and allow the user to save his username & password.
4) Actual result:
The actual result describes what happens in the application now. In other words, this is the current behavior of the application, and it is the reason for writing the defect report. The actual result must be different from the expected result. If they are the same then there is no reason for writing a defect report.
5) Priority:
Priority describes how urgent this defect requires fixing. A high-priority defect should be fixed as soon as possible. A low-priority defect doesn’t have to be solved soon.
6) Severity:
Severity describes the impact that this defect will have on the user if he encounters it. A high severity defect will have a severe impact on the user if he encounters it. A low severity defect will have a low impact on the user if he encounters it.
Some projects mix between priority and severity. So they use one attribute to describe both priority and severity. Priorities can be classified into four levels: Critical, High, Medium, and Low. Here are some example defects and their priorities:
Critical: Login isn’t working – Application crashes in Home Page – Wrong values in the cart
High: Login page responds slowly – User is not able to change his profile picture
Medium: Some pages have slow performance – Portrait mode includes some misalignments
Low: Spelling mistakes
7) Screenshot (or video):
Adding a screenshot or a video to your defect report will make the developer’s task much easier. The screenshot should show the screen on which the issue occurs, and it is better to add a red circle or rectangle around the defective area.

In windows, you can take a screenshot using paint. Click on the “PrtScn” button on the keyboard, open paint, and then click on “paste” or “Ctrl + V”. You can then add a red rectangle around the defective area like in the screenshot provided.
In Mac, you can click on “Command + Shift + 4” and then add a red rectangle around the defective area. To record a video, you can do it for free using this website https://screencast-o-matic.com. On the mac, you can open the QuickTime Player application, choose File -> New Screen Recording.
To take a screenshot from your mobile phone, mostly you will need to click on the power button and the increase volume button to take a screenshot. Some mobiles require clicking on different buttons, so you can google for your device name and see how to record the screen using it.
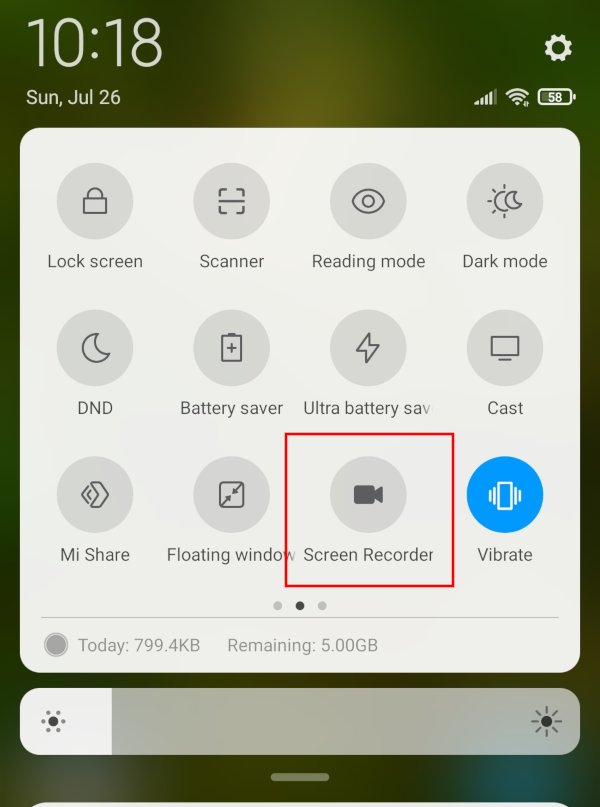
Most android phones include a built-in video recorder that can be accessed from the control menu.

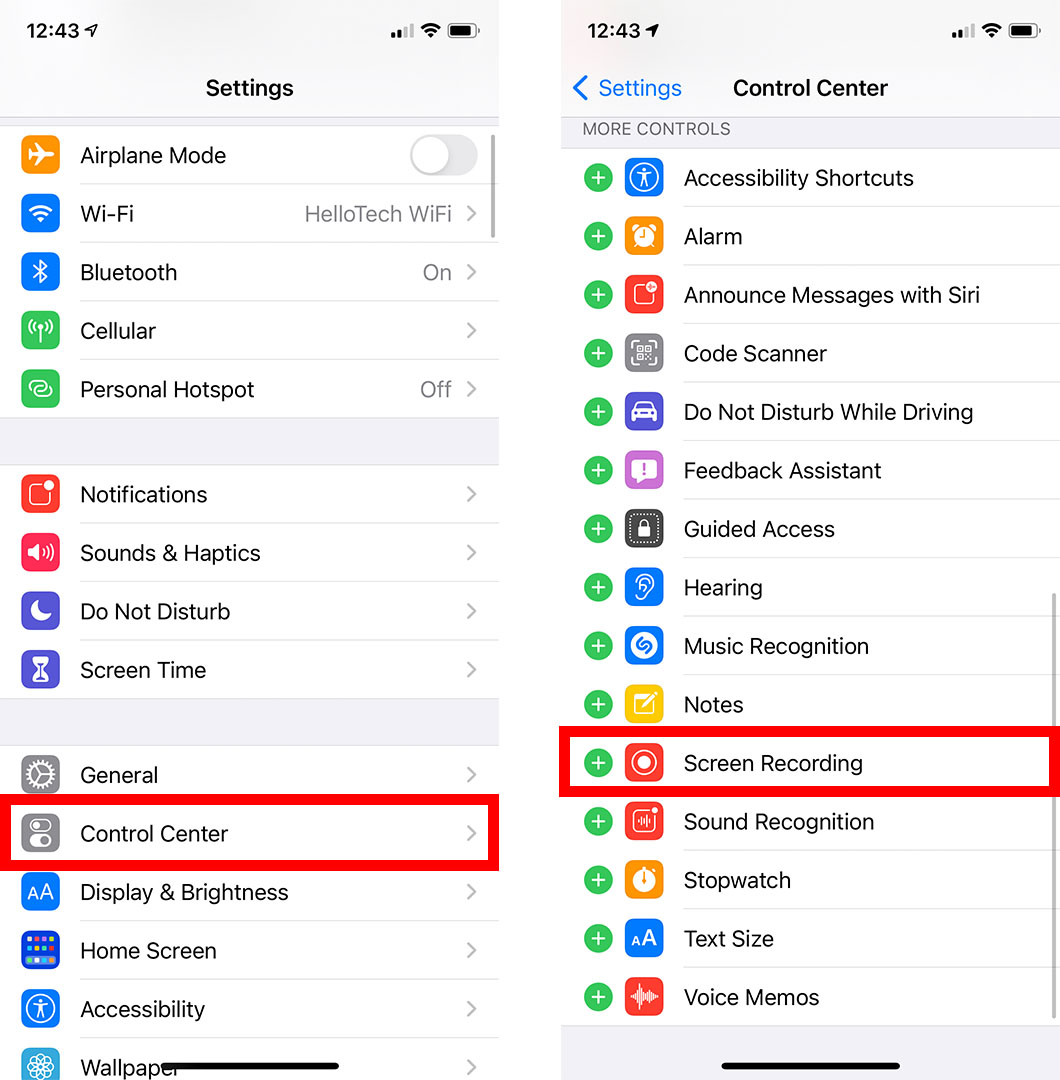
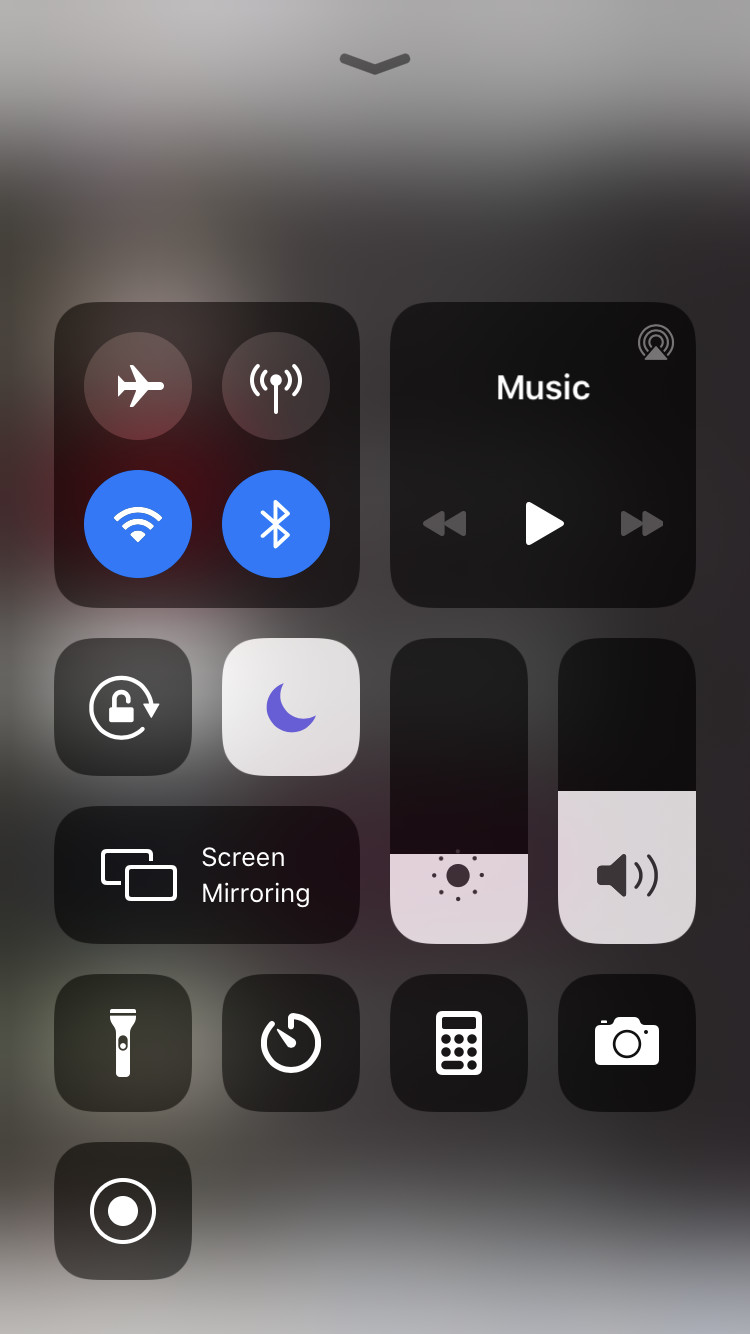
To record a video using your iPhone, you can follow the steps in the next screenshot.


8) Test Environment:
The test environment should cover three topics: Software, hardware, and network. The software can be: Android 11, iOS 15, Chrome 75, Firefox 82. Hardware can be OPPO F11 Pro, iPhone 12 Mini, Dell XPS Laptop, Macbook Pro. The network can be Wi-fi, 5G, 4G. So a test environment for a defect can be iPhone 12 Mini, iOS 15.1, 5G network.
9) Issue Type:
There are many types of defects which are:
Functional:
Example: Forgot password functionality is not working.

Visual (UI):
Example: Missing UI elements in the login page.

Content:
Example: A sentence is written two times “Duplicated.”

Performance:
Example: Video takes too long to play
Suggestion/Enhancement: This is not a defect, but the tester is proposing a better way to implement the functionality.

10) Reproducibility Rate:
Not all defects are reproducible. Some defects are repeated each time we repeat the test, and some defects rarely happen. The reproducibility rate can be a value from 1 to 5. 1/5 means that the defect is rarely reproducible. 5/5 means that the defect is always reproducible.
A full defect report can be:
Title: Login -> Forgot password button is not working
Expected result: The button should be clickable and redirect the user to the “Forgot password” page
Actual result: Button is not clickable, and nothing happens when the user clicks on it
Test environment: Samsung Galaxy Note 10 – Android 10 – 4G Network
Priority: High
Issue type: Functional
Reproducibility rate: 5/5
Steps to reproduce:
Open the application
Tap on Login
Tap on Forgot password
Related Posts
Difference between Responsive Testing and Cross Browser Testing
Introduction to Performance Testing
Cross Browser Testing Explained
Your Guide To Get Started With Scrum Methodology
Agile Methodology: 4 Values and 12 Principles
How To Document Test Scenarios Using Trello
9 Types of Testing Every Tester Should Know
Seven Steps of Testing Process
Difference between Static and Dynamic Testing
7 Principles of Software Testing
Latest Posts
Difference between Responsive Testing and Cross Browser Testing
Difference between Responsive Testing and Cross Browser TestingWhat is meant by cross browser testing? Cross browser...
Introduction to Performance Testing
Introduction to Performance TestingIntroduction to performance testing Did it ever happen to you that you get to...
Cross Browser Testing Explained
Trying to test your website across different browsers can be time-consuming and error-prone. But with the help of these handy tools, testing your website in different browsers will become a lot easier!


